Replacing the Bus Batteries (Part II)

(continued from Part I)

The first test was to check for a short in the system, which will also track phantom loads as well.  For this, I took my multimeter and set it to test for amps.  If you’re going to try this, make sure you set for DC amps and that you switch your positive lead to that one that you never normally use when looking for resistance or for how much charge a battery has.

Then, make sure that all your vehicle’s switches are off, no key in the ignition, etc.  You want to try and eliminate all EXTRA power draws and find just those that exist when the vehicle is just sitting there.

Next, unhook the a battery terminal connection to your bus (or car, or motorcycle), and bridge between the batteries and the connection with the multimeter. I chose the positive lead for my test because when I slide my battery box tray out, those leads are well exposed and really unlikely to short on anything, but you can choose negative and it will work the same way.   What you’ll see is a number of amps that are being drawn by the electrical systems of your vehicle from the batteries.

When doing this, start with your amp setting at it’s highest range, then slowly bring it down.  My draw came out at about .7 amps, which is what the ECM draws at rest.  If you come up with some higher number, you can try to pull fuses and see if you can find a system that’s drawing load when it shouldn’t.  If you come up with a fairly high amp load that you can’t account for through your existing vehicle systems, you might have a short, and then you have to start tracking your wiring harness(es)!

The next thing I did was to check the voltages of the batteries individually.  As I had already started on taking off the positive batter connection to the vehicle, taking the batteries out of parallel to test was simple.  And one of the batteries was only holding 10 volts while the other held 11, and this was after being on a charger for about 2 days.  I tried charging them separately, and while I could get the one holding 11 up to 12.6 volts of charge, it dropped really rapidly.  The one that was only a 10 volts just stayed at 10, but made boiling sounds that a sealed battery just shouldn’t while charging.

My multimeter doesn’t have a min/max function and I don’t have a load-tester (which basically creates a load using a high resistance draw),  so I couldn’t verify that neither battery dropped below 9.6 volts when trying to start.  But the fact that they weren’t holding the charge, or even able to charge to full showed that it was time for new batteries.

I ended up being able to get them from Batteries + Bulbs which had a couple of (basically) local stores.  This allowed me to order online and get a 10% discount, but go to the store and pick up the batteries.  I got two nice Group 31 sealed batteries which had more amps than the ones I removed! (And as an aside, they are Duracell batteries – which I didn’t realize they made such a big battery!)

Hatch secured!

So, how to actually change the batteries?  First, open up the battery box and make sure that the hatch is secured, so it doesn’t slam down on your head before you get ready to go out to the theater. (Yes, of course it has happened.)

Batteries and power cords/cables galore.

Next pull the pins and pull out the battery tray. From the picture, you can see why I chose my positive terminals to disconnect – they’re  well away from any of the bodywork that might short.  Next, remove the main connection to the bus (I chose positive again), then the other and any ‘jumper’ cables that run the batteries in parallel (or series), but remember where they go (or went).

The battery securing system in our bus.

Then, remove the other connector line from the bus, then from the batteries themselves.  After that, it’s a matter of removing the means of securing the batteries into the tray.  On my bus, this is essentially a piece of angle iron with holes to fit a threaded ‘J’ rod that hooks into holes on the tray about halfway up the width of the battery.  These are easily removed, but otherwise secure because of the wingnuts that hold them in.

Once the batteries are loose, it’s an easy matter to remove the batteries. I took the time to clean out the tray, and put in a layer of the non-skid shelf liner that I had around.

  This is a sort of puffy and grippy foam screen. On the one hand, I thought this would help to secure the batteries, and on the other, it might provide them with a little shock-dampening.

New batteries in place.

Then it was simply a matter of doing all these things in reverse.  The new batteries went in and were secured.  I then reattached the negative jumper to the batteries, and then the negative contact to the bus.  Next came the positive jumper and the positive contact to the bus, and everything was ready to go!

I have to say that when I went to try everything out, I was amazed at how the new batteries spun the engine up.  The new batteries had a great charge and so much more power that the old ones.  I reattached the battery minder, and hopefully these will have the same life-span as the ones I just replaced.


Replacing Bus Batteries (Part I)

So, I’ve always tried to be careful about the bus batteries.  Without them the bus really doesn’t move, which can be frustrating as you sit in your driveway ready to go somewhere, and really frightening if you’re at a site and it’s time to leave. I’ve run into both of these situations, and learned a lot from them.

The two batteries wired in in parallel.

One of the things I had learned was that the two batteries that our bus came with didn’t keep a charge long-term. When we first got it, and I discovered this, I went through the system with as fine a tooth comb as I could for the seeming miles of wiring looking for places where there could be a drain.

I ended up removing a tachograph which had a clock that kept running, and disconnecting a number of system from power, even though they were on a circuit that ran off the ignition switch triggered power relay, just in case.  The one thing that I couldn’t detatch was the ECM, which draws some 700 mA  to maintain the error codes and other brain-related functions.

In order to combat this small drain, I picked up a small solar panel to essentially be a trickle-charger and offset the ECM’s needs over the long periods of not being used. 

As our driveway faced west at the time, and the house and a big elm tree blocked the southern light, I ended up mounting it just on the windshield defroster duct, and running the power over to the line that connected to the batteries/ECM/alternator inside the cab.

While this helped, I continually was having problems if the batteries were left alone, to the point where I’d throw them on the charger before I went anywhere if I hadn’t had a chance to start the bus in the last month.  Overall, it wasn’t so bad.  And after the bus had run for a bit, the batteries would be fine.

Once I installed the DC inverter and ran AC power in, I had thought things would get a little better. The inverter was supposed to not only change the AC power to DC, but also charge up the DC batteries.  I had hooked it to the house batteries, but found after our fateful trip to Evangola State Park (when the alternator died, as did the bus batteries) that it wasn’t doing any charging.

Subsequently, I got a couple of battery-tenders for the battery sets. 

Products from Amazon.com

These will give a full charge, if needed, and the switch to a trickle when the batteries are set, and will work for either AGM, sealed, or lead-acid batteries.  And up until this spring, they worked like a charm on both battery sets.

Unfortunately, due to a number of factors, I didn’t move the bus (or even try to start it) from October to April.  It sat with the maintainer attached, so I wasn’t worried, but when I went to start it to go get it inspected, there wasn’t enough power in the batteries.  A little annoyed, but otherwise un-phased, I got out the car charger, and sit it up to charge overnight.  The next day, I went out to start it, expecting the batteries to be ready, as they usually were after a charging event like that, but they just barely got the engine going.

Usually after some driving time the alternator cranks out plenty of power to charge the batteries, and as I watched the voltmeter on the dash, I could see that the alternator was pushing out 14 volts (which is pretty high compared to the 13 or so I normally see), so I was sure the low batteries were getting what they needed.

So, it was a bit of a surprise to talk with the dealership on the phone (there were some issues with the suspension system in order to pass inspection) and find out that the batteries were dead when they went to bring it into the garage for the inspection.  They asked if I wanted them to deal with the batteries, and I said no.  So long as they could give me a jump to get the bus back home, I’d deal with it.

One of the big reasons for this is that if there’s a short somewhere that’s causing the drain, it could rack up some serious dealership-level mechanic’s hours in fees.  And it’s something that I could trace and deal with on my own.  I was also sure that nothing was an unnecessary parasitic draw (the radio, for example, runs off the house batteries, so even the electricity for the memory for the preset stations doesn’t drain the bus batteries), and I didn’t want to have mechanic time going to check that.

So, I started in on testing …

(Continued in Part II)

Our Eclipse Trip (Part 9 – Mammoth Cave & Big Bone Lick)

(Continued from Part 8 …)

Mammoth Cave!

So, we finally made it along the narrow Kentucky roads to Mammoth Cave National Park.  The place was tucked back in some lovely forested hills, and the Visitor Center was very well attended.  So well attended, in fact, that there was only about 2/3rd of a single RV spot left to park in, as most of them were filled with cars!  As I parked in as tightly as I could, and went back to see if cars could get by. I wasn’t as happy as I could have been, but upon starting to walk to the Center, I noted that someone was heading for the bus, and it turned out they were moving the car in front of it, so I moved the bus up and was much more comfortably parked.

At the beginning of the path looking up toward the level of the Visitor Center.

We hit the well appointed bathrooms, then went to see about tours.  I had done some research on the tours, when looking at Mammoth Cave as a destination, but not about making advance reservations.  All but the self-guided walking tour of the shallowest, historic cave entrance tour were sold out! So, we got our tickets and made our way to the entrance, which was down a fairly steep path from the center.

The park is in south central Kentucky, and consists not only of the caves, but an area of the Green River valley (and hills around it).  The geology is a limestone ‘karst’, where the groundwaters seep into the limestone bedrock and erode it away, letting groundwaters flow deeper underground, sometimes creating underground lakes and destabilizing more bedrock causing rockfalls, or for the waters to find even deeper paths to follow.  These can create cave systems as waters flow to greater depths, and previously used in/outflows are left dry and unused by the water.

Mammoth Cave is the longest surveyed system, stretching more than 390 miles with potential for as much as a 1000 mile system.  This length is determined as having a way for a human to climb/swim through naturally existing openings, but not through active mining activities.

Heading down into the caves.

The historic entrance is where we entered, walking over a shoe cleaning pad (because of the white nose fungus that attacks bats) and then down a stairway to get us down into the caves. While this entrance looks massive, there are places just inside the baffle doors where it’s less than 6 feet tall and you have to watch your head.

Plenty of space.

But then you wind around a curve, and the whole thing opens up.  Quite a bit of the cave along through here was mined for calcium nitrate (saltpeter) during the War of 1812, but was later used briefly as a tuberculosis hospital, as well as a tourist attraction.

I’m in this picture for scale …

While we could only explore a small amount of the miles and miles of cave,  But that was kind of okay, as the cave was kind of chilly compared to the hot, sunny, summer day outside.  We chatted with some of the park rangers who were explaining about the caves and answering questions, and spent an hour and a half or so inside the cave.

Where the River Styx comes aboveground.

While the caves are the main attraction of the park, there are lots of trails that cover the hills too.  We spent some time walking further down from the historic entrance toward the Green River (which used to have a riverboat stop), where we turned aside to see where the ‘River Styx’ exits the cave complex at its deepest levels.

Our son said it was either named by a dog, or someone with a low sense of humor …

After some more hiking around and then climbing back up to the Visitor’s Center, we get back onto the bus and headed off to our stop for the night. It was a short trip on the smaller roads to get out to I-65, and then it was an easy trip to I-71, then another short trip on the smaller roads to get to Big Bone Lick, which we arrived at just before dark!

Some of a bison bison recovered from the salt lick.

Big Bone Lick is actually a place where salt deposits from the evaporation of an ancient sea are getting redissolved into underground springs which bring the saline water to the surface.

They have a friendly giant sloth at the museum.

Animals would come to the area to literally lick at the ground, but the moist soil in some areas would be like a quicksand that the animals ( including forms of bison, caribou, deer, elk, horse, mammoth, mastodon, moose, musk ox, peccary, sloth, and possibly tapir) who gathered could get mired in, and after they sank in, the salty soils could help preserve the bones from decomposition. Plenty of prominent people (like Lewis and Clark) came during the 1700’s & 1800’s for scientific investigation and study of the remains.

The campgrounds were pretty nice, with each site having electric hookups and every two sites sharing water hookups where we were. That said, there were rules about not washing dishes by the hookups or in the restrooms, so we took our dirty dishes with us, not having the plumbing tanks in place.

A nice view from the bedroom.

The sites backed up on some nice greenery, though some had some significant slope.  I used some 2x material to level us up. Just at the top of the hill, at the end of the loop, was a trail that led along to the Visitor’s Center/museum and the bison pasture.

Live bison, not fossils.

We spent some of the morning at the museum, and then watching the bison.  They have a nice-sized herd, with both adults and young.

It’s waffle time!

After this, we set off to make our way to Buffalo.  We did make a stop at a Waffle House in Ohio, but otherwise we made the trip in good time.  While it was (surprise) dark when we got home, we were back, and all worked out well for us on the trip – it was a success!

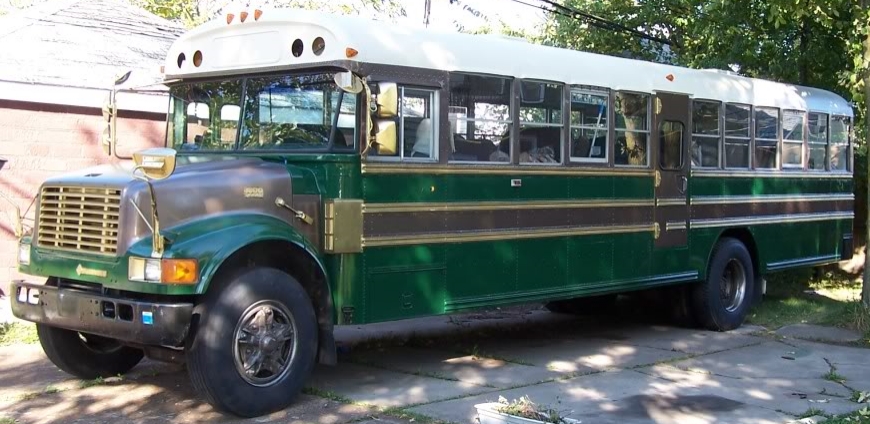
Rebuilding a school bus into a rolling house.