Category Archives: learning

Swapping out IDMs and back again …

So, in my previous post, I talked about the bus not starting when the engine was hot (coolant temperature around 180 degrees), and I think the blame lies with the IDM (Injector Driver Module).  As such, I ordered one from Shop Injectors and went to replace it.

Searching on the internet, I had the vaguest of ideas where the IDM was in the 1995 T444E engine compartment, so I remembered to take pictures while I undertook the replacement.

The IDM in its natural habitat.

The IDM is located on the firewall above the engine, almost right up by the hood.  It is covered with a metal plate where some relays and positive cables are installed. The positive cables connect here and they’re live(!) so be careful about them touching anything.

Air Intake Sensor on the back of the intake line.

The cover is only held on by one screw, underneath the cover, so the easiest thing to do is remove the air intake line from the filter.  There’s a sensor just to port of the IDM case cover, so remember to unplug it before trying to move the intake.

Air Intake Line removed/swung out of the way.

As my bus has air brakes, the feed line for the compressor also comes off this air intake line, so rather than fully removing it, I just swung it back off to the driver’s side and out of the way.

Lower intake covered for safety!

Remember to cover up the lower end of the air intake so you don’t end up feeding gunk or spare screws and bits into the  turbo!

When removing the single screw holding the casing on (#3 phillips), be careful to try and catch the clip that the screw threads into.  Mine ended up on the transmission, but it could end up finding a place to hide there that would make your day miserable.

Casing removed and clipped to the radiator supports.

Once the screw is out, the top just needs to be lifted slightly, and the angles on the back of the top of the casing will come right off the back plate.  The two angles on the outer ends fit behind the plate, while the middle one rests in front of it, making it fairly secure.  I didn’t need to remove/unplug any of the wiring from the casing, as I was able to swing it also toward the driver’s side and hook the angles over the radiator supports.

The IDM, mounted on the firewall behind the engine, with the cover off.

The next step was to remove the plug from the IDM.  This requires a 10mm wrench or ratchet.  Given the voltages that this unit puts out, they don’t trust it to just clips, and the bolt is fairly long.

The IDM Plug that makes it all happen.

Once the bolt is loose there is one clip that you have to undo, but then the plug just slides out.  When I looked at mine, I saw some corrosion on the plug and the prongs of the IDM.  They are fairly easy to clean up with a pipe cleaner (since none of my files fit into the holes).

The back plate without the IDM in place. The bottom two screws dont need to come out.

All that remains after that is to undo the screws that hold the IDM to the back plate.  The top two need to come all the way out, and again have those clips that the screws fasten into.  The bottom two only have to be loosened up, as the IDM has grooves that they fit into, making the process (and that of inserting the new module in place) really painless.

Putting the new module in is as simple as reversing the process, making sure to snug but not over-tighten the bolt that holds the plug onto the IDM.

Unfortunately, after all that, the new IDM that I installed didn’t do anything!  The engine just spun when I tried to start it.  Swapping the old (now cleaned of corrosion) IDM back in, then engine started just like it always did (at least when it was cold).  I went back and forth between the old and new IDMs, and the new one just didn’t work.

I’ll now have to road-test the old module and see if it was a corrosion issue, and send the new IDM back to the company to have it tested.  The guy who I’d been in contact with before about the delivery was very helpful, so I don’t expect a problem.  But at least I now know how to make the change if I still have problems.
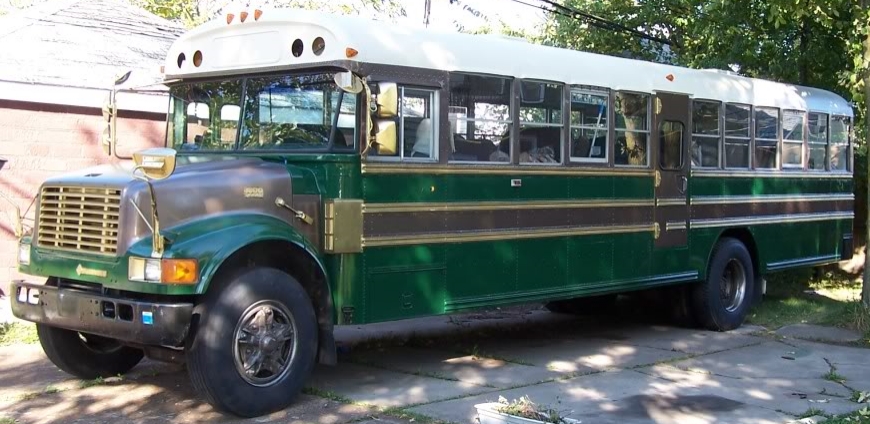


After the tow … An exploration in a hot bus engine not starting.

So, in January, there was a nice, (relatively) warm day that I decided to take the bus out and fill up the bus’ fuel tank.  The drive down to the Rez was uneventful, the bus was driving nicely, and all was well.  I pulled up to the pump, shut down the bus, filled the tank, turned the key, and the engine spun.  It spun way too easily.  And it never caught.

Perplexed, I let it spin for twenty seconds or so, then stopped and waited a minute before trying it again, only to get the same result.  After about 10 minutes of waiting and trying to start, I’d run the batteries down.  Luckily, we have AAA (with RV), so I called for service, hoping I could get (at best) a jump-start, or barring that get towed to the dealership back in Buffalo.

After it started to rain and the tow driver (Justin or Jordan (Sorry!) from Bach’s Towing) arrived and sized up the situation, we found that we just couldn’t get sufficient juice from the tow truck to start the bus, so it got towed back to the International dealership (Regional International) where I get all my inspections and service done.   After them charging it and checking it, it started up right away, and continued to do so every day they checked.  One of the mechanics drove it around a bit, and it started after that too.  They just couldn’t replicate the problem.

The IDM, mounted on the firewall behind the engine, with the cover off.

They found an error message about a missed toggle in the IDM (Injector Driver Module), but it didn’t show up again.  And, as the IDM was an expensive unit, they didn’t want to replace it if they weren’t sure it was the problem.  This unit takes the 12 volt power and ups it to 115 volts(!) to control the operation of the fuel injectors.

So I went and picked up the bus from the dealership, and drove it to a local park (Chestnut Ridge Park, which was still fairly close to Buffalo in case things went really badly) so I could have some time to myself, and it didn’t start again. My hypothesis was that if the engine was fully up to temp (up around 180 degrees on the coolant), that was when the problem happened. So, I decided to wait half-an-hour and THEN try to start it.  After the wait, it started up fine.

The Eternal Flame at Chestnut Ridge Park

I drove it around inside the park a little to the head of a hiking trail, getting the engine back up to temperature (~180 degrees) and after shutting it down, it again wouldn’t start, it just spun.  After a hour-long hike, though, it started up great.

As the dealership had not been able to replicate the problem, and I had replicated it twice in the space of an afternoon, I was a bit annoyed.  So, I took to the internet.

It seems that there are three major issues with the T444E that can cause the ‘spin but not fire’ starting issues.  The first is the IDM, which, when it fails to send power to the injectors at the behest of the ECM (Electronic Control Module), the engine gets no fuel.  The second is the IPR (Injector Pressure Regulator) which is a solenoid valve to control the high pressure oil feed.  The third is the CMP (or CAMP) (Camshaft Position Sensor)  which notes a certain slot pattern on a camshaft disk which indicates that cylinder 1 is in the correct timing position.

Any one of these failing can get the ‘spin but not fire’ situation.  I could also get that if the fuel filter was clogged, but then it wouldn’t start when the engine was cold either. So, at any rate, the parts were ordered from Shop Injectors and updates are to come.

A Week in the Bus (Allegany State Park trip – Part II)

(Continued from Part I)

After arriving around midnight at the campsite, we set up the basics, and got to bed. My wife and I ran into a bit of a problem with our bed situation, as the air mattress we had been using had developed a leak that I couldn’t patch, and the replacement we brought was a king-sized one that wouldn’t fit in the back area. Luckily, with just the three of us in the bus, we could share the bottom bunk, while our son took the top bunk.

We had a nice site near the top of the hill on our loop. For the Red House camping area, the A loop and B loop had their own bathroom facilities, while the C and D shared a bathroom, I think with the E loop. There were abundant water taps, and fairly nice stone rings for firepits, though no grates. We realized that we’d been spoiled, as the fire pits and rings at Sprague Brook and Evangola had attached and adjustable grates to cook on.

Luckily, the camp store was literally down the hill and across the road from our site, and they had a nice round grating that I could perch on stones in our firepit and make a cooking surface. They also sold a 30amp to 15amp plug adapter, which I found I needed, as the 15amp power plug on the power tree was a GFCI outlet that kept tripping when I plugged into it (which of course was happening after midnight in the light rain.)  

I was totally perplexed as to what was tripping the outlet, as the system worked fine on my garage’s 15amp breaker, so after going through everything and eventually unplugging a number of non-essential systems including the plug from the inverter (even though the breaker for the inverter’s power feed was off), I finally got us basic power for lights and the fridge. After spending part of the morning tearing apart the main power in plug and the breaker box, I found that it seemed that the GFCI was being tripped by the ground of the plug of the inverter.

As the ‘main’ of the box is just a regular breaker, I had wired in the plug end of a 12 gauge extension cord into an unused breaker in the box, with the understanding that in order to power the system with the inverter, I would first turn off the main, then turn on the inverter breaker, and to go back to land power, the inverter breaker would go off first, then the main would go on. But as the inverter was set to take a grounded plug, but only connected to the 12VDC positive and negative, it seemed that the GFCI ‘saw’ the system with a return/ground fault in the 110AC system. Once I put the adapter in and plugged into the 30amp outlet, there was no issue, and all worked the way it was supposed to.

We finally got to use the stove, and it preformed admirably. While most of our cooking was done over the wood fire, the burners of the stove did a nice job with popcorn, and the oven did a great job with flatbread pizzas (and a 12” round fits easily). However, I’ve found that I need some small receptacle for spent matches, though I’m realizing that all those ashtrays that have fallen into disuse should provide for something both suitable and attractive.

The troubleshooting/improving never stops …


(More on the park in Part III)